
Rethinking Your Key Art Game Plan, Part 2
Guest blogger is The Film Collaborative’s Creative Director, David Averbach, who has worked with dozens of TFC Clients and other filmmakers to help them create and refine their key art. See Part I HERE
Note: This Key Art series is intended for micro-budget filmmakers whose crew is not under a union contract. If your film’s crew is under an IATSE contract, you will need to abide by the rules regarding still photographers on set as forth by the union. We have been advised that there may be penalties involved by bringing an intern or PA in to shoot stills.
Last week, in Part 1 of this blog series, I discussed how relying solely on 1920×1080 pixel frame grabs was a bad idea if one wanted to create a poster that featured some sort of main image. In an ideal world, your entire film would be shot on a 5K camera, and you could pull as many frames from the footage as you wanted. That would be Plan A. But in the real world, many filmmakers emerge from their shoots with only 1080p frame grabs, and that’s not going to work.
Another problem is about marketing. During the chaos of a film shoot, filmmakers often forget to think about the art they might need to support a variety of possible marketing ideas and concepts, and are therefore left with fewer choices and placed in an ultimately weaker position vis à vis possible options on how to market their film without an expensive and inconvenient reshoot.
This blog series offers some concrete advice on how you can protect your film’s marketing future by adding a few inexpensive steps to your key art game plan.
A photographer on the set with a second 5K camera is great if you can afford it. That would be Plan B. But if your budget is limited (or even if it isn’t), last week I suggested a third plan—a “Plan C”—that as far as I’m concerned should be executed whether your film is entirely being shot on a 5K camera or whether there is a professional photographer on set or not. I’m sure I made some of you cringe by suggesting that you pick up a cheap but powerful point-and-shoot camera and putting an intern or production assistant in charge of shooting “hi-res scraps”—basically a lot of shots of the characters in various poses during the down time on a film shoot—that can be utilized down the line by a designer to execute the envisioned poster. The bottom line is this: as a designer myself, I’d rather have the opportunity to work with shots taken from a cheap but decent camera than nothing at all.
One of the reasons I suggested this is that while professional photographers undoubtedly bring a great deal of talent to a set, their exact skill set may not be entirely conducive to producing key art elements. A photographer’s eye for composition usually relies on what they see in bounds of their view-finder, and having them do some of the things that I’m going suggest here in Part 2 of this key art blog series may cause a bit of pushback and confusion. It’s best to let them do what they usually do and concurrently (i.e. Plan C) have a go with the point-and-shoot/intern thing. Of course you don’t have to use a point-and-shoot camera if you have a better one available. But I work with a lot of filmmakers whom I feel would find an excuse not to do this if there were more work/more cost involved. And if you use an intern or a production assistant, or perhaps a rotate through a handful of them, you’re giving them something real to do, which will inspire them to do a better job in everything they are their to do for you. It’s a win-win. Have them take as many photos as they can. Just make sure you buy some extra high capacity compact flash cards.
Now onto Part 2…
You may have an idea of what you want your poster to look like even before you begin your film shoot. Great. But don’t plan for that to be the only idea you execute. You should produce the photos necessary to execute MANY ideas. Here are some possible concepts.
Have a discussion about marketing before your shoot and come up with two dozen ideas. They don’t have to be all that specific. If your film involves one main character, or a pair of characters, then let’s assume for the moment that you could feature them in some way in terms of poster real estate…Accordingly, my first example will be to think a bit about how you could execute a concept that features a single image that takes up the entire poster. Again, you decide what that single image should be…perhaps it’s your main character. Perhaps it’s two characters. Perhaps it’s something else. But here’s the takeaway: at this stage, don’t produce a shot. Produce ELEMENTS.
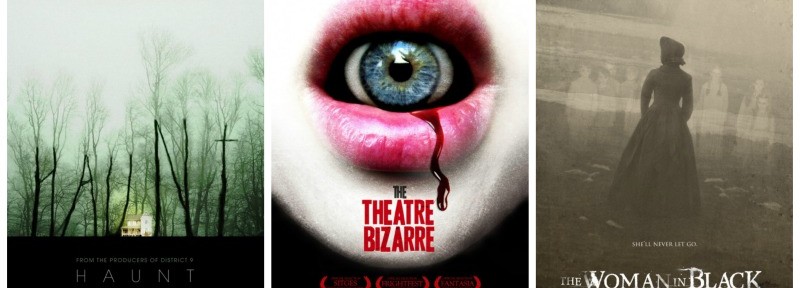
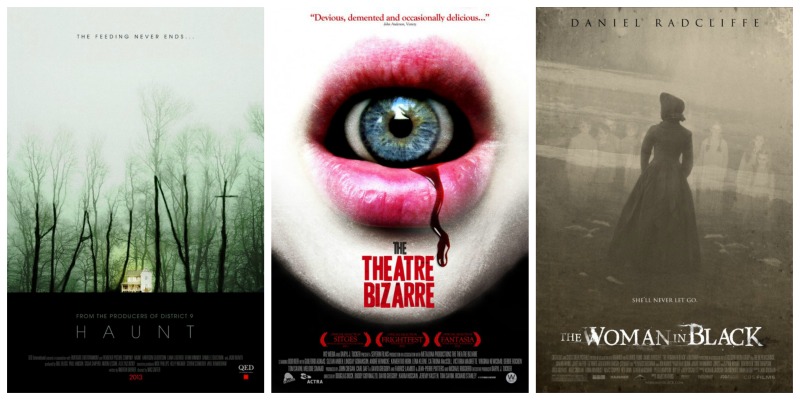
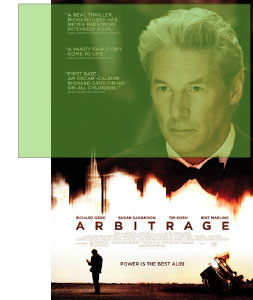
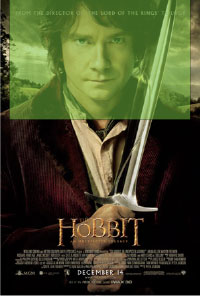
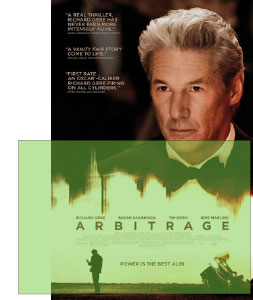
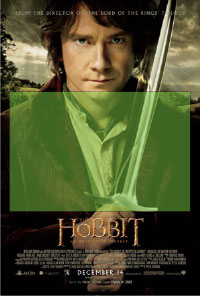
Let’s have a look at a few posters from current movies that involve a single shot. If these movies aren’t your taste, it doesn’t really matter…the concepts can be applied to almost anything or any style of poster.
 |
 |
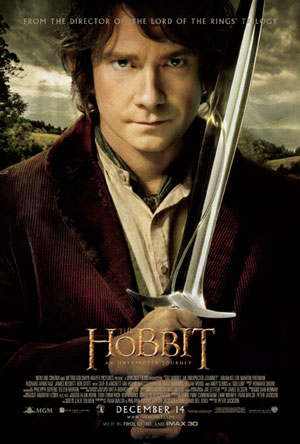 |
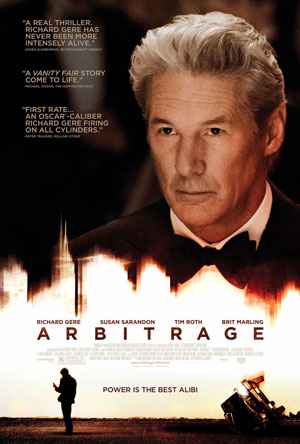
Looking at these posters closely in as full a resolution as I could find online, they have one thing in common: each image of the actor is a cutout placed in front of a different background from which the shot was taken. Artbitrage is the most blown-up…if you walk up to this poster in a theater and had a close look, I suspect, you’d see quite a bit of distortion. In The Hobbit, they’ve added a bit of noise to mask the upresing and blend it in with the colors of the bucolic background scene, but I suspect the picture was a much higher res to begin with. Gatsby remains the clearest photo, and the crispness works well with the art deco concept. A designer could create any of these looks with a photo of like the one of Leo DiCaprio, but it would be hard to create a Gatsby-like effect with the photo of Richard Gere.
In the absence of a large format camera in a studio environment, to get as full a resolution as possible, here’s what I suggest, and I know this is a bit unorthodox, but it’s pretty straightforward. Set up a white sheet as a background, or if your subject has a lot of fly-away hair, you may want to try it with a green or blue screen. (I found a cheap one here.) This will allow the designer to take away the background to produce a cutout. This is really no big deal for a graphic designer, unless there is a ton of hair involved, in which case, be sure to try it with a number of different backgrounds. This isn’t a shampoo ad, so shaving off a little hair is forgivable in this arena.
First, take a normal full body shot in portrait orientation just so there is at least one shot of the entire scene you are trying to capture.
But this shot will not be the one that is used. Instead, break the photo up into several shots…the trick is not to hold the camera in portrait orientation but keep it in landscape while you do this…then later on your designer reassemble them into a unified whole.
Why do it this way? Last week, I showed you what you can expect to achieve with a 16.1 megapixel camera:
![]()
Doing it this way will give you the most resolution to work with…
You may need to do it a few times to insure consistency in terms of lighting etc., but with the magic of photoshop, this shouldn’t be much of an issue. You’d want to be careful not to break the shot in the middle of any complicated parts, such as the person’s eyes or mouth, for example.
Start with the person’s face…make sure not to cut off the top of the head (even though two of heads in the posters here are cropped)…
 |
 |
 |
Then quickly lower the camera vertically and take another shot, so that the second overlaps just a bit, to get the upper part of the torso.
 |
 |
 |
Make sure to take dozens of shots like these, so that you have enough photographs to mix and match, as sometimes the pictures can vary in terms of lighting, or your hand is not in the exact position, etc. If there is a prop involved, I would not have that in the shot, but just have them grip something similar and photoshop the item (like a sword) back in later. (Remember to also take pictures of the prop using this technique.)
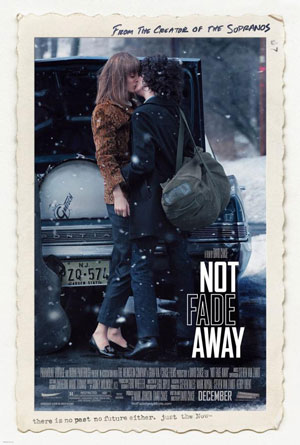
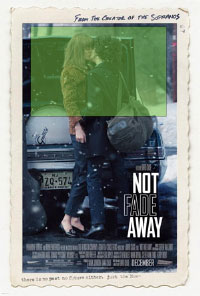
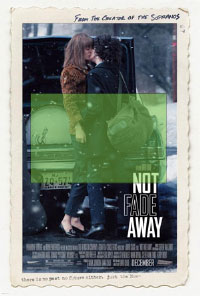
Perhaps you don’t want to feature just one character…after all, your film may not involve such a recognizable star as Richard or Leonardo. Let’s say you really want a particular shot of two of your main characters in some sort of pose. Like in the following film, Not Fade Away.
 |
 |
 |
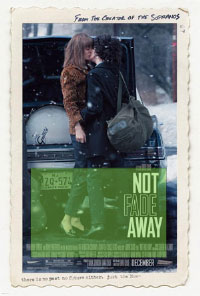 |
It is a bit counter-intuiative, but what I would do here is photograph the two characters in front of a solid background, not in front of the car. Then take a background photo (using the same technique here) of the car without the people. Then have your designer photoshop them together later. I would even go a step further and take a picture of the car without its background, and then take the trees as a separate photo. You never know how the composition will work best with your title treatment, or in different orientations (have a look at key art that is modified for a landscape orientation in iTunes trailer art…you’ll want to be able to move things around to create the look you want in the space that is allotted).
The point is that you are producing elements, not photos. Therefore, don’t just do this type of work for your actors/characters. Do it for your locations as well. You never know what background you may want to use, and the more shots you take, the more options you will have.
Of course, all this requires thinking ahead. But you will be glad you did.
Found this post informative? Check out David’s advice on Developing Key Art as your film enters the festival circuit.
David Averbach December 21st, 2012
Tags: film marketing, film posters, graphic design, key art, Photoshop, set photography, The Film Collaborative, unit publicist
Publicizing Your Film at a Festival
TFC reached out to Film Independent/Los Angeles Film Festival’s Director of Publicity and Communications, Elise Freimuth, to discuss to the “Do’s and Don’ts” of working with Publicists on the Film Festival circuit. The following are her “insider” thoughts on the subject…

Festivals reach audiences
With so many independent filmmakers going the DIY route, more and more of you are taking on publicity and marketing responsibilities. As a result, you need to educate yourselves on the essentials of the trade. Even if you do end up hiring a publicist, it’s important to understand some basics so you can be empowered and know the right kind of questions to ask when selecting a publicist or putting together a PR strategy with them.
Many indie filmmakers make the mistake of thinking about publicity when they get accepted into a film festival, but in truth, you need to start thinking about PR when you’re putting your budget together. Costs need to be factored in early on for possibly hiring a unit photographer, hiring a publicist once you do get accepted to a festival, paying for room and board for talent to attend a festival and creating press materials.
Create your press materials early! So many filmmakers put these off and then have to scramble to pull assets together when they get accepted into a film festival. A publicist is usually hired about 1-2 months before a festival, so it doesn’t give them much time to work on your film. Give them as much time as possible to pitch your work by giving them a package of nice materials. They may have suggestions to spice things up a bit, but at least they’re not having to start from scratch.
We’re in the moving pictures business for a reason– we like telling stories with images. And images are incredibly important when you’re promoting your film. Creating high-quality still images from your film will go a long way in helping you promote your work and save you from a huge headache down the road. If you can’t afford a unit photographer to come in for a few days during the shoot, then have a photographer friend or someone from your camera department (so many video cameras can create beautiful stills) take high-quality still photos for you. If you have name talent, you should schedule a photographer on the days you’ll be shooting key scenes with them. Your photos should properly convey the tone (comedy vs drama) and reveal something about the character or story. A generic close-up of a character reveals nothing—it could be from any film.
Journalists want photos that are going to help them tell the story about your film and they’re going to want to grab their readers/viewers. Photos should be high resolution (at least 300 dpi), and most news outlets prefer horizontal. When selecting images, keep in mind that you may need to get key talent to sign off on these, so go through their representatives and have them do their “photo kills” early so you’re not chasing them down 3 weeks before a festival. Also, you really only need 2 or 3 great still images. When audiences start to see the same photo running online and in magazines and newspapers, it’s easier for them to recognize your film. And given the time constraints journalists have nowadays, the last thing they want to do is troll through 20 pictures. They want to look at a few and pick one.
Following these guidelines will also help film festivals. Their marketing departments need to put together program books, ads and build their website, and it’s really hard when filmmakers submit low resolution photos in non-traditional formats. You’ll also want to consider holding back a few photos for exclusives down the road when you get a theatrical or digital release. Some publications like USA Today, Los Angeles Times, New York Times and Entertainment Weekly like to use exclusive photos for their movie previews and articles. Plus, it’s a great way to do an extra push and leak out exclusive content when you’re releasing your film.
Gone are the days of putting your clips and trailers on bulky and expensive beta tapes. Most festivals and broadcast/online outlets just require a digital file, preferably in HD that you can e-mail, post on your website or share via file transfer websites. Just like with photos, a couple clips of key scenes that convey your story and tone are all you really need. Clips should only be about 30-45 seconds long. Trailers are nice, but they’re not terribly necessary at this point. If your film gets acquired, they’re just going to cut a new trailer and the process can be rather pricey. Usually broadcast outlets aren’t going to show festival film trailers, unless there are huge stars involved. There are some online outlets that may run your trailer, but again, don’t break your back over this. If you do decide to do a trailer, just make sure it’s no longer than a minute and a half and it should be well-edited and tell your story without giving everything away.
Production notes are really handy for journalists to refer to when prepping for interviews with you or your talent, or to fact check when they’re writing reviews or stories on your film. These notes do not need to be 35 pages long. Keep them sweet, short and simple. Include a log-line (1 line), short synopsis (2-3 lines), long synopsis (2-3 paragraphs)—these also help the festival staff when they’re putting together their materials. You’ll want to include short bios (1-2 paragraphs) on yourself, key crew and cast. A director’s statement is always nice, but not necessary. This should be 1-3 paragraphs and can explain your reason for making your film, explain controversial elements behind the film, the style you chose, etc. Don’t include reviews and interviews from other publications in your production notes because journalists don’t need to see other people’s work in your notes. A full list of credits is also essential as film critics need to include this information when they file their review. If they don’t have the full credits, this sometimes prevents them from actually filing a review of your film!
Posters are lovely to have as a souvenir, but not necessary for publicizing your film at a festival. The festival will ask you for these because they’ll sometimes display them for a day or two at the theater venue or in their filmmaker lounge, but that’s about all they use them for. Posters are expensive to make, so if you’re on a budget, this is the thing to cut. Maybe opt for some creative hand-out material with your screening schedule on it if you’re on a budget and are really keen on printed material. A small postcard is easy to hand out to people you meet. Some filmmakers get even more creative and hand out matchbooks, coasters, buttons and more to go along with the theme of their film. But again, all of these things are just fun add-ons if you’ve got the money for them.
If you start getting interview requests and screener requests (see paragraph about screeners) before the festival begins, hold off on setting these up until you’ve hired a publicist or put a PR strategy in place. The last thing a publicist wants is to come on board a film and find out you’ve set up a bunch of interviews without them. Or egads! Set it with someone they know could potentially attack your film or not fit in line with the strategy.
Don’t hire a publicist if you haven’t gotten into a film festival or have a theatrical/digital release. They’re more than happy to take your money, but you won’t get a return on their services if you’re not actually screening your film anywhere. So many filmmakers think they need to hire a publicist as soon as the film is done, but you’ll just be spending dollars that can be used more effectively once you secure that festival slot. You should aim to hire your publicist within 1-2 months of your festival screening, but start asking your sales agent, friends and fellow filmmakers for recommendations and put together your wish list early. Once you find out you’re in a festival, you can start making the calls to these publicists and set up meetings. These meetings are kind of like a first date or a dance—you need to find out if you like each other, can work together and they can execute the proper strategy for your film. They should obviously like your movie, but they should also have a strategy and be able to openly talk with you about potential negative reactions that could result from the press and industry, weaknesses in your film and how to navigate those, and be able to work closely with your sales agent (their strategies need to align). In some cases, the publicist is really there to support the sales agent, and having one who understands distributors is also helpful. Having a cheerleader isn’t enough—that’s what your parents are for. Your publicist should have a plan, know the press attending and be able to strategically execute that plan. For festivals like Sundance, Toronto, Cannes and SXSW, the price you pay will be higher because it needs to cover room and board for the publicist. Expect to pay anywhere from $7-12K. Believe it or not, the costs for sending a team of publicists to these festivals ends up breaking even for them. They’re working on your film because they’re passionate about you and your work. For festivals like the Los Angeles Film Fest, AFI, New York Film Fest and Tribeca, there are tons of locally based publicists in entertainment, so you have a wealth of people to choose from. If you’re playing in LA, select a LA-based publicist and in New York, New York. Why? So you don’t have to pay more for their travel. PLUS, they’re going to be a lot more familiar with the local press attending that festival. Expect to pay $3-7K for these festivals.
Whether you hire a publicist or not, don’t blow your wad at the very beginning. It’s incredibly exciting for you now that you’re playing in a film festival. You want to see a ton of press breaks and have everyone interviewing you and your talent, but you need to reign it in. You want people to discover your film and if you go hog wild with interviews, then no one will want to interview you or your talent when the film finally gets that theatrical/digital release. It’s like turning the heat on to boil a pot of water. You want that water bubbling for your festival PR campaign—you don’t want it boiling over. Work on getting included in some festival curtain raisers—i.e. previews that mention films to catch or look out for. A handful of interviews are all you really need with some key outlets that cater to the audience you’re trying to target.
Decide whether it’s the industry you want to focus on, or raise awareness about a certain issue, or reach out to a certain fan base. BE TARGETED. If you’re a small documentary or narrative with no stars, then Access Hollywood will not want to cover you. They only want the A-list talent. Be REALISTIC and SMART about the type of press you can get.
Communicate with the festival PR staff. If you’re doing DIY, then reach out to them personally. If you have a publicist, make sure they get in touch with the staff so they can be notified of press opportunities that might fit your film, or get some leads. If you’re on your own, the festival PR staff is there to help you. They have tons of films they need to publicize and are mostly focusing on publicizing the festival as a whole, not individual films. They can’t play favorites because all the filmmakers are their children here, but they can give you advice on putting together a PR strategy, point you towards journalists they think might be interested in your film and how to reach out to them. They’ll appreciate that you’re thinking about PR in a smart way and not just asking for their press list so you can blast out multiple e-mails and invites.
A note on screeners. BE CAREFUL WITH THESE. The festival PR staff may ask you for copies of screeners, but you don’t have to provide these. It should be an option. The risk in providing these to the festival is that any accredited journalist can walk in and watch your film on a laptop, small TV or check it out, and you won’t know who it is. They can always pass along screener requests from the journalist directly to you or your publicist so you have more control over who is seeing your film early (the same goes for acquisitions execs! Let your sales agent send these out!!) It’s really best to protect your screeners and only give them to journalists if it works with your PR strategy. Some journalists may need to see the film early for a curtain raiser or feature and are nice about only including films they like. There are other journalists who could potentially badmouth your film before the festival screening. Make sure you or your publicist knows the intent of the journalist. Some films just play better on the big screen with an engaged crowd and some films play better on your laptop with a box of Kleenex at your side. Figure out how your film plays and let that help guide you on whether you want to share screeners.
Orly Ravid May 31st, 2012
Posted In: DIY, Film Festivals, Publicity
Tags: Elise Freimuth, festival publicity, film festival, Film Independent, film publicity, LA Film Festival, postcards, posters, PR assets, PR budget, PR strategy, set photography, working with a publicist